The MASS straps are very versatile, but easy to use. This guide is meant to show you a variety of methods for mounting your gear anywhere you want to train.
End Point Attachment
You can attach MASS straps to just about any sturdy overhead support, such as a bar, beam or joist. Attachment to a bar is quick and easy. The various methods shown can be used for on-the-go training or permanent installations.
Carabiner Method
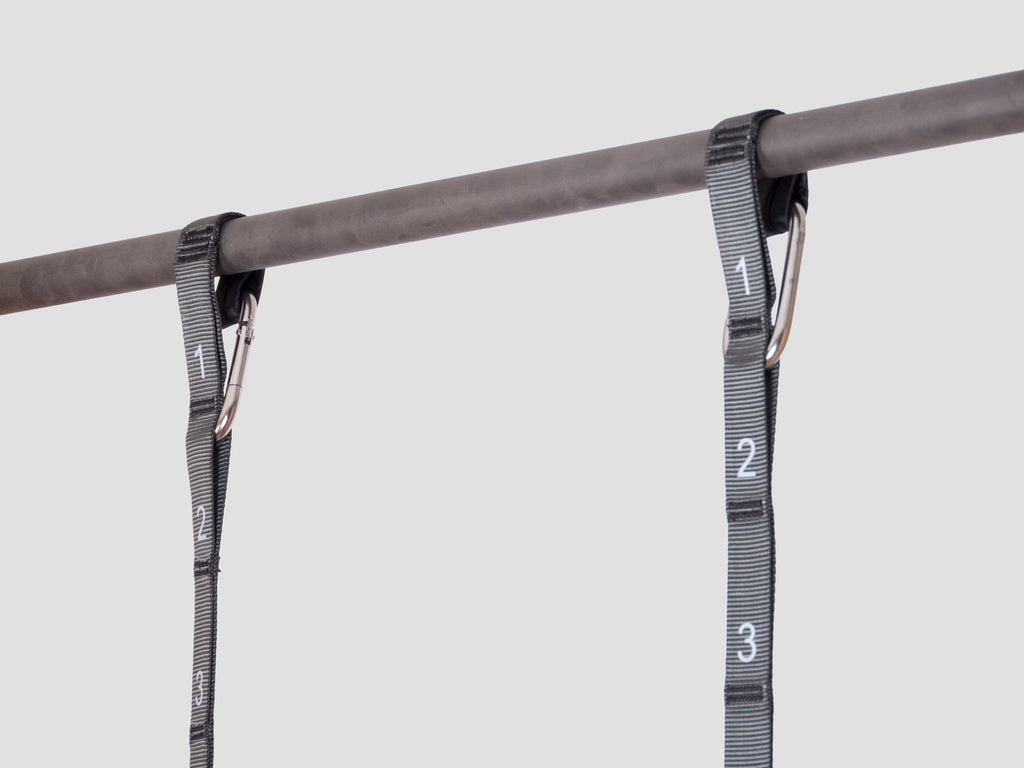
Step 1. Attach a carabiner to the end of the MASS strap.
Step 2. Toss it over the bar and clip the carabiner back onto itself. Have the numbers facing out for easy readability.
Step 3. Check the length of the strap. If it reaches past the floor, you can start from a lower attachment point. This means there will be a loose end at the top near the bar. See the image below

This method is quick and easy, allowing for easy setup nearly anywhere.
Slip Knot Method

Throw the strap over the bar.
Step 1. Pass the entire strap through the end attachment point.
Step 2. Pull the strap all the way through. It will tighten securely against the bar.
This method is great for permanent installations. Because it wraps tightly around the bar, it prevents lateral sliding. Not recommended for temporary installation. You must be able to easily reach the slip knot in order to untie it.
Device Attachment
You can attach Elite Rings or the Freestyle Trainer handles directly to the MASS strap attachment points. Or you can create a loop to connect to. You can create loops at the upper or lower ends of the strap.
Direct Attachment

Step 1. Take the carabiner attached to the Elite Rings or FST handle and unlock the carabiner by pressing the gate open.
Step 2. Insert the upper arm of the carabiner into a numbered attachment point.
This method is quick and easy. It does mean there is a loose end underneath the handle, which can sometimes be a nuisance. If it is, you can use a carabiner to clip the excess strap back onto itself.
Loop Attachment

Step 1. Unlock the carabiner attached to your ring or handle by pressing in the gate.
Step 2. Clip the carabiner to the bottom of the loop.
This method gives you only half of the adjustable range of the straps. It is nice for keeping everything organized and unobstructed, since you can slide the mounting carabiner and excess strap up and out of the way.
This method is recommended when you need to mount to a bar you cannot reach for disassembly.
Gymnastic Ring Setup Methods
These methods work great for setting up the Elite Rings 360, but can also be used for the Freestyle Trainer.
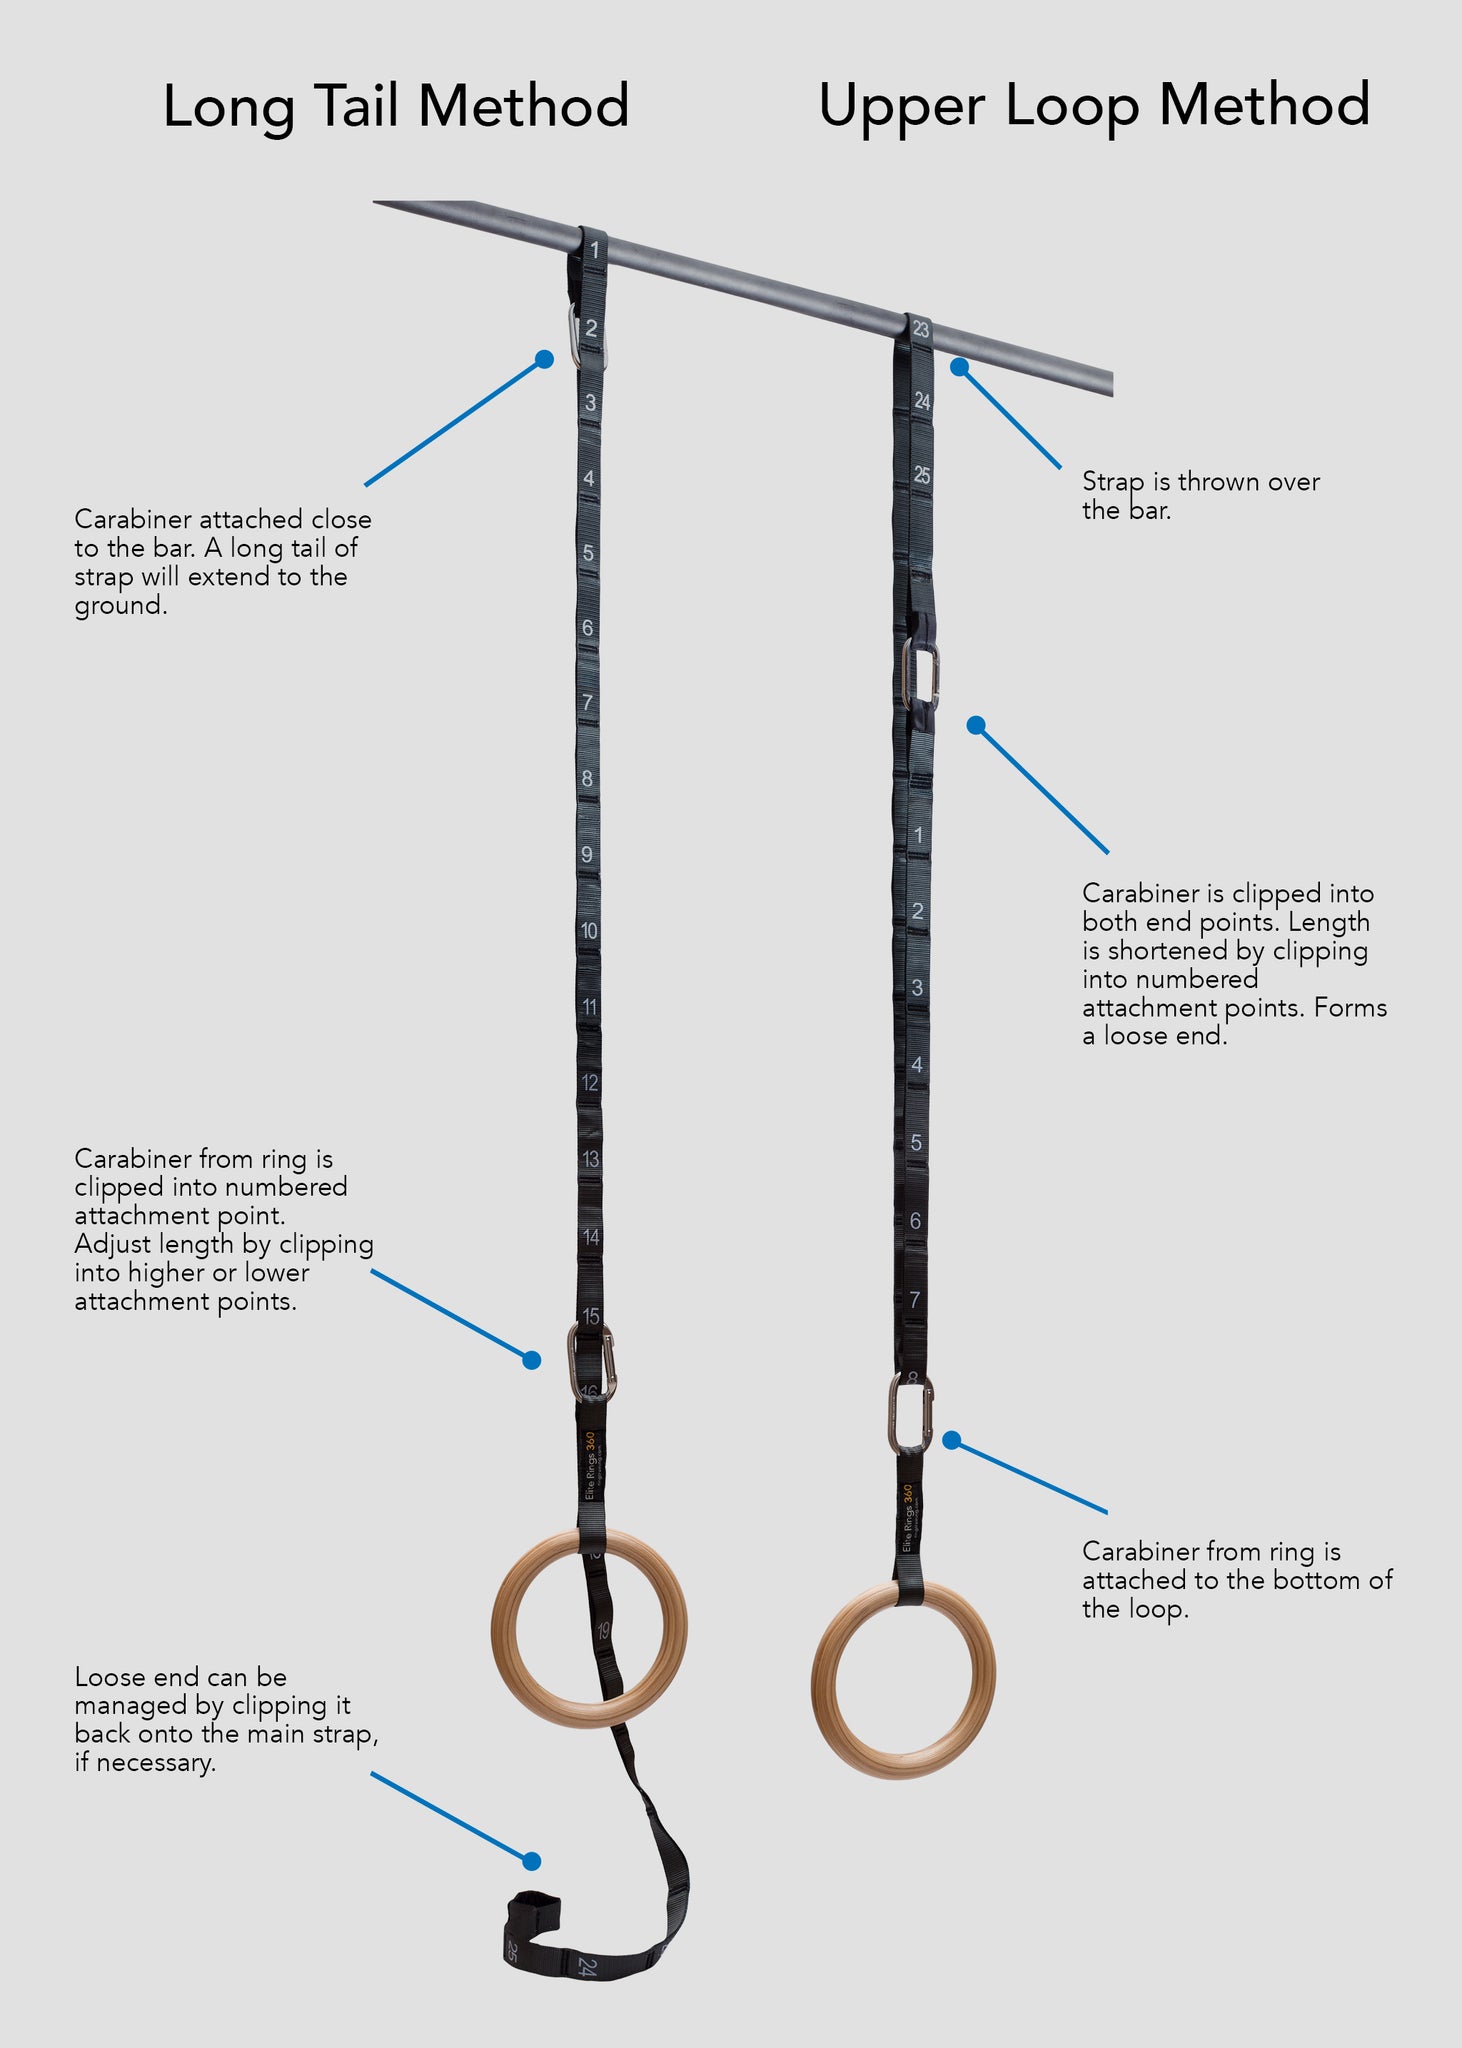
Long Tail Method
-Attach with a carabiner close to the bar or use a slip knot.
-Clip your ring or FST handle’s carabiner into any numbered attachment point.
-Any excess webbing can be clipped back onto the main strap (same as Lower Loop Attachment) or to the side. Or ignore the excess webbing if it does not bother you.
This method is the least organized, but it’s very fast. If you are changing the height several times during a workout, this method is very useful.
Upper Loop Method
-Take the top mount carabiner and move it down lower on the strap. This creates a bigger loop as you move the carabiner further from the bar.
-Slide the loop of webbing around the bar to move the carabiner and loose end up and out of the way.
-Attach your ring or handle to the loop.
Freestyle Trainer 360 Setup Methods
The following methods work great for setting up the Freestyle Trainer. The lower loop method also works well for rings.
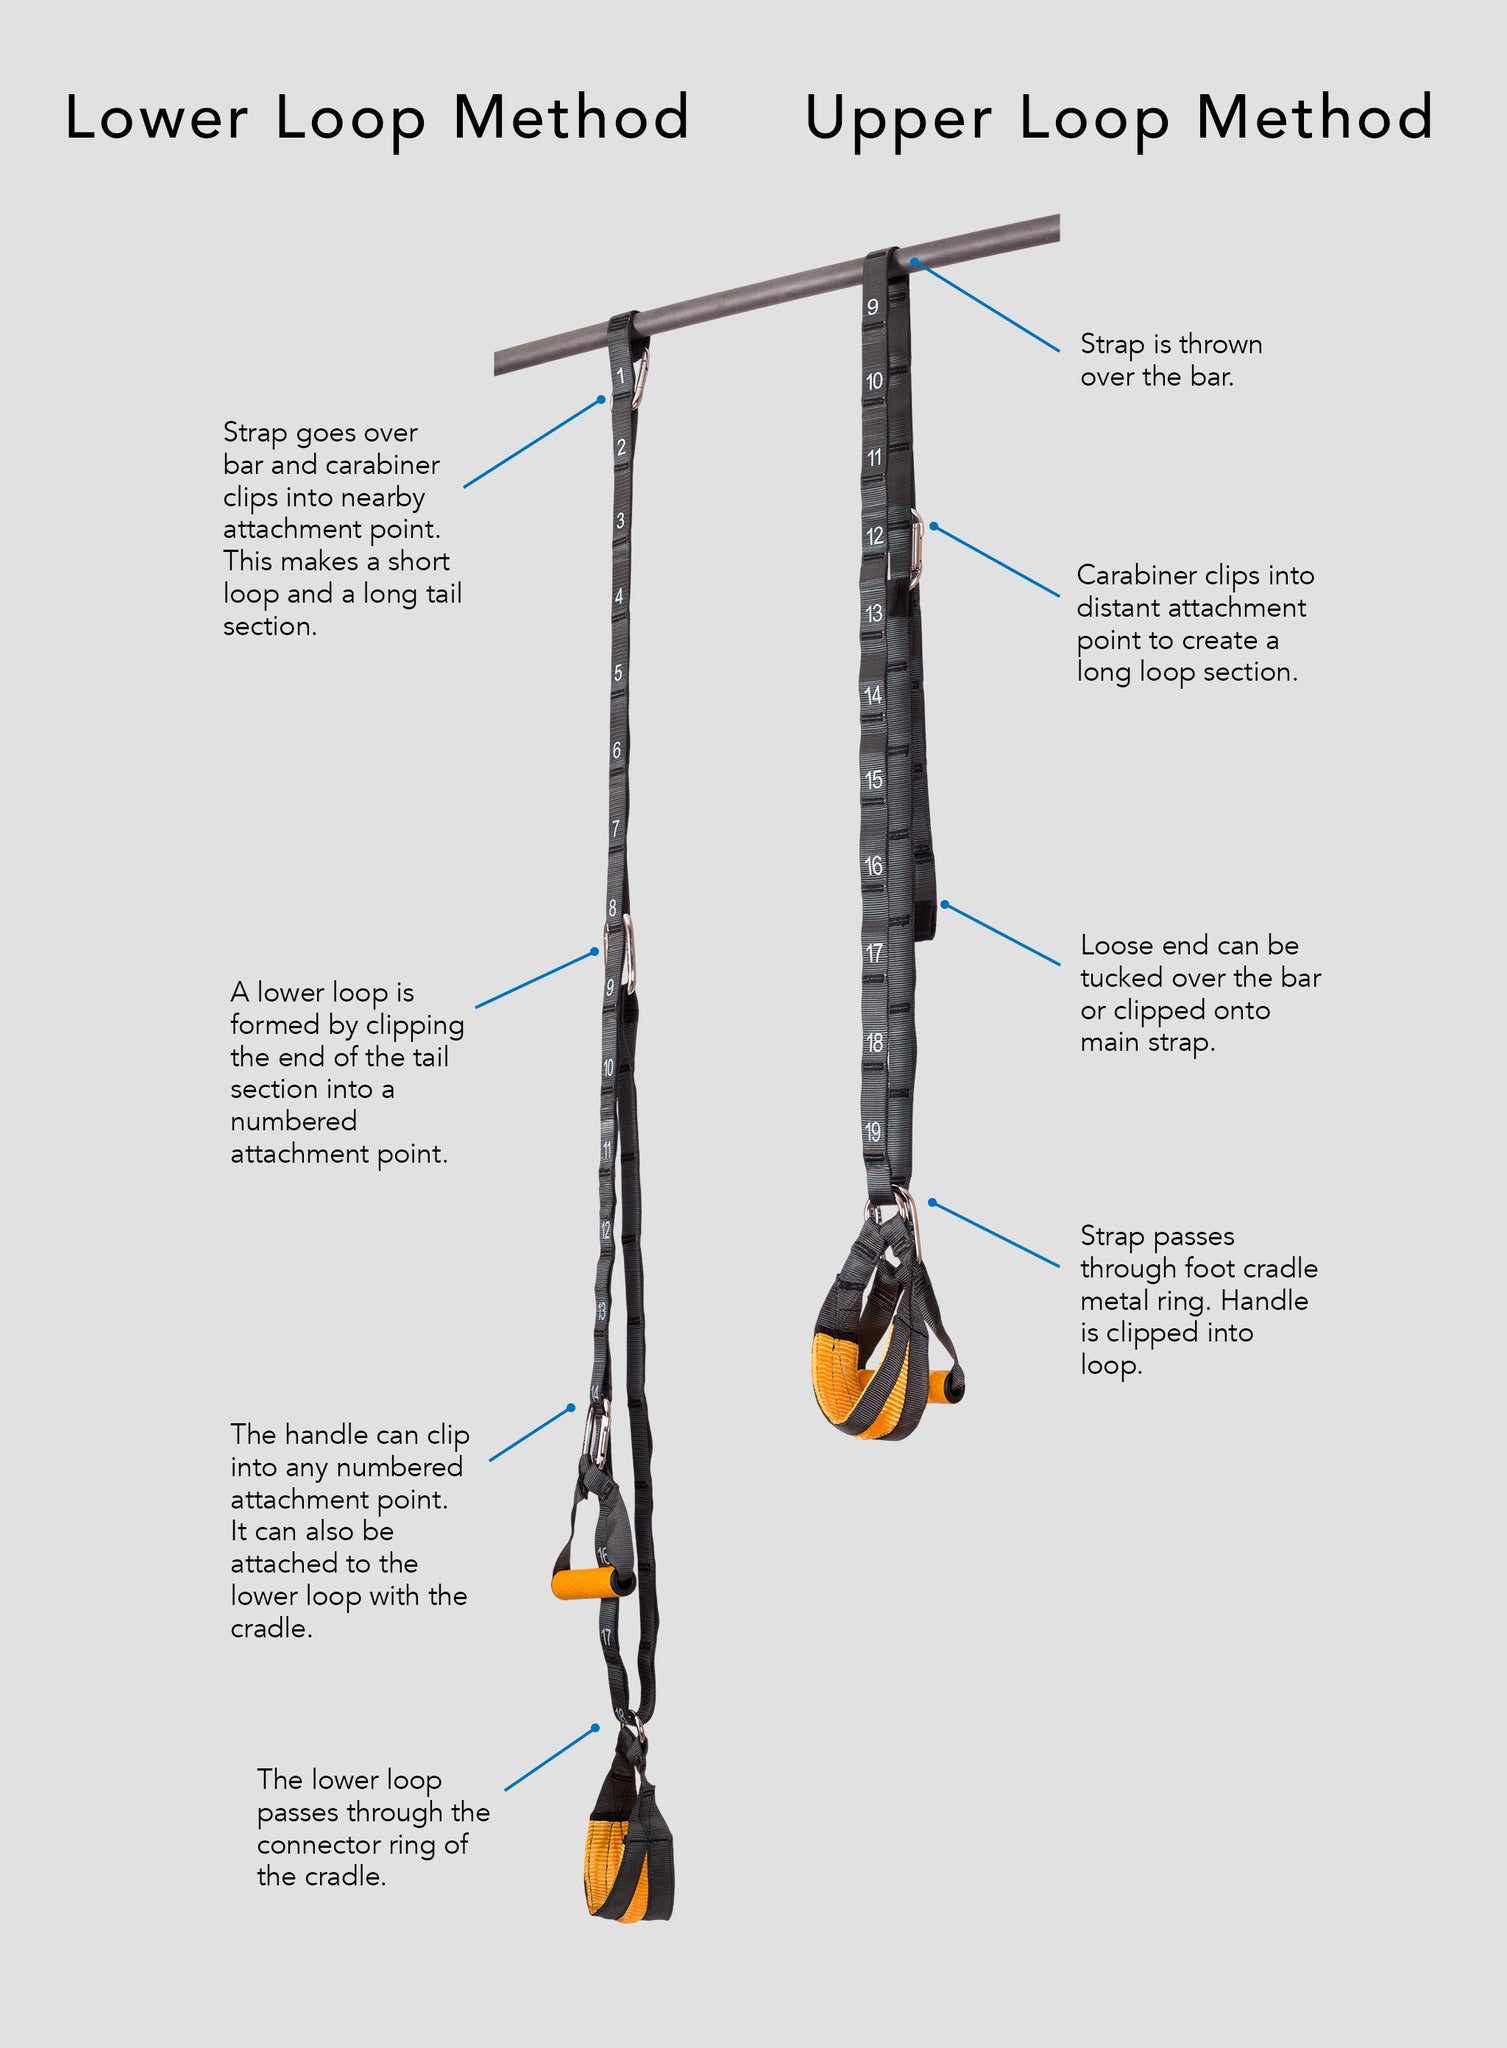
Lower Loop Attachment
-Attach the main strap to the bar with a carabiner or slip knot.
-If you are attaching a foot cradle, do it now. Pass the end of the strap through the metal ring of the foot cradle.
-Attach a carabiner to the lower end of the strap.
-Connect the low carabiner back onto the strap, forming a loop at the bottom.
-Attach a ring or FST handle to the lower loop.
-Or attach your handle directly to the attachment points.
This method is great for accessing the whole length of the MASS straps and it is also well organized. You can adjust the height by raising the lower loop or directly attaching rings or handles anywhere on the strap.
With the Freestyle Trainer, you can hang the foot cradle low to the ground and then clip the handles into any attachment point on the main strap.
Vertical Attachment
You can setup up the MASS straps on a vertical support, such as a pole. This can be convenient in locations where you don’t have access to a bar or other overhead support.
-Double wrap the strap around the pole.
-Pass entire strap through the end you wrapped around the bar.
-Pull tight, forming a slip knot around the pole.
Recommended Standard Width
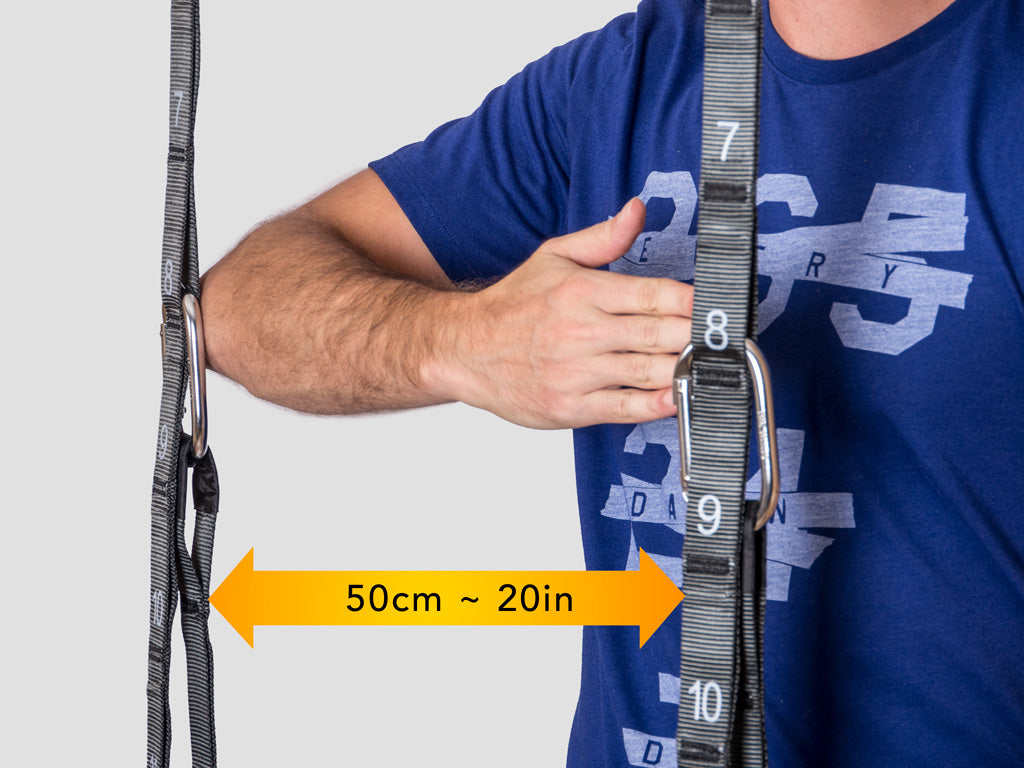
The standard for gymnastics rings is 50cm, or 19.7". We recommend this as a good starting point. You can also use the distance from your finger tips to your elbow to approximate shoulder width.
Warning- Cover Abrasive Surfaces
If you are attaching to bare wood or any type of rough surface, be sure to cover it with a towel. Abrasion causes permanent damage to the straps and can lead to equipment failure.